Aero enterprises
tailwheel instruction
Your typical tailwheel airplane center-of-gravity is aft of the main gear. That means that once in motion, physics is at play, trying to swap the tail-end for the front-end. This condition can not only be embarrassing when viewed by others, difficult to takeoff, land, and taxi, but damaging to airplane and pilot.
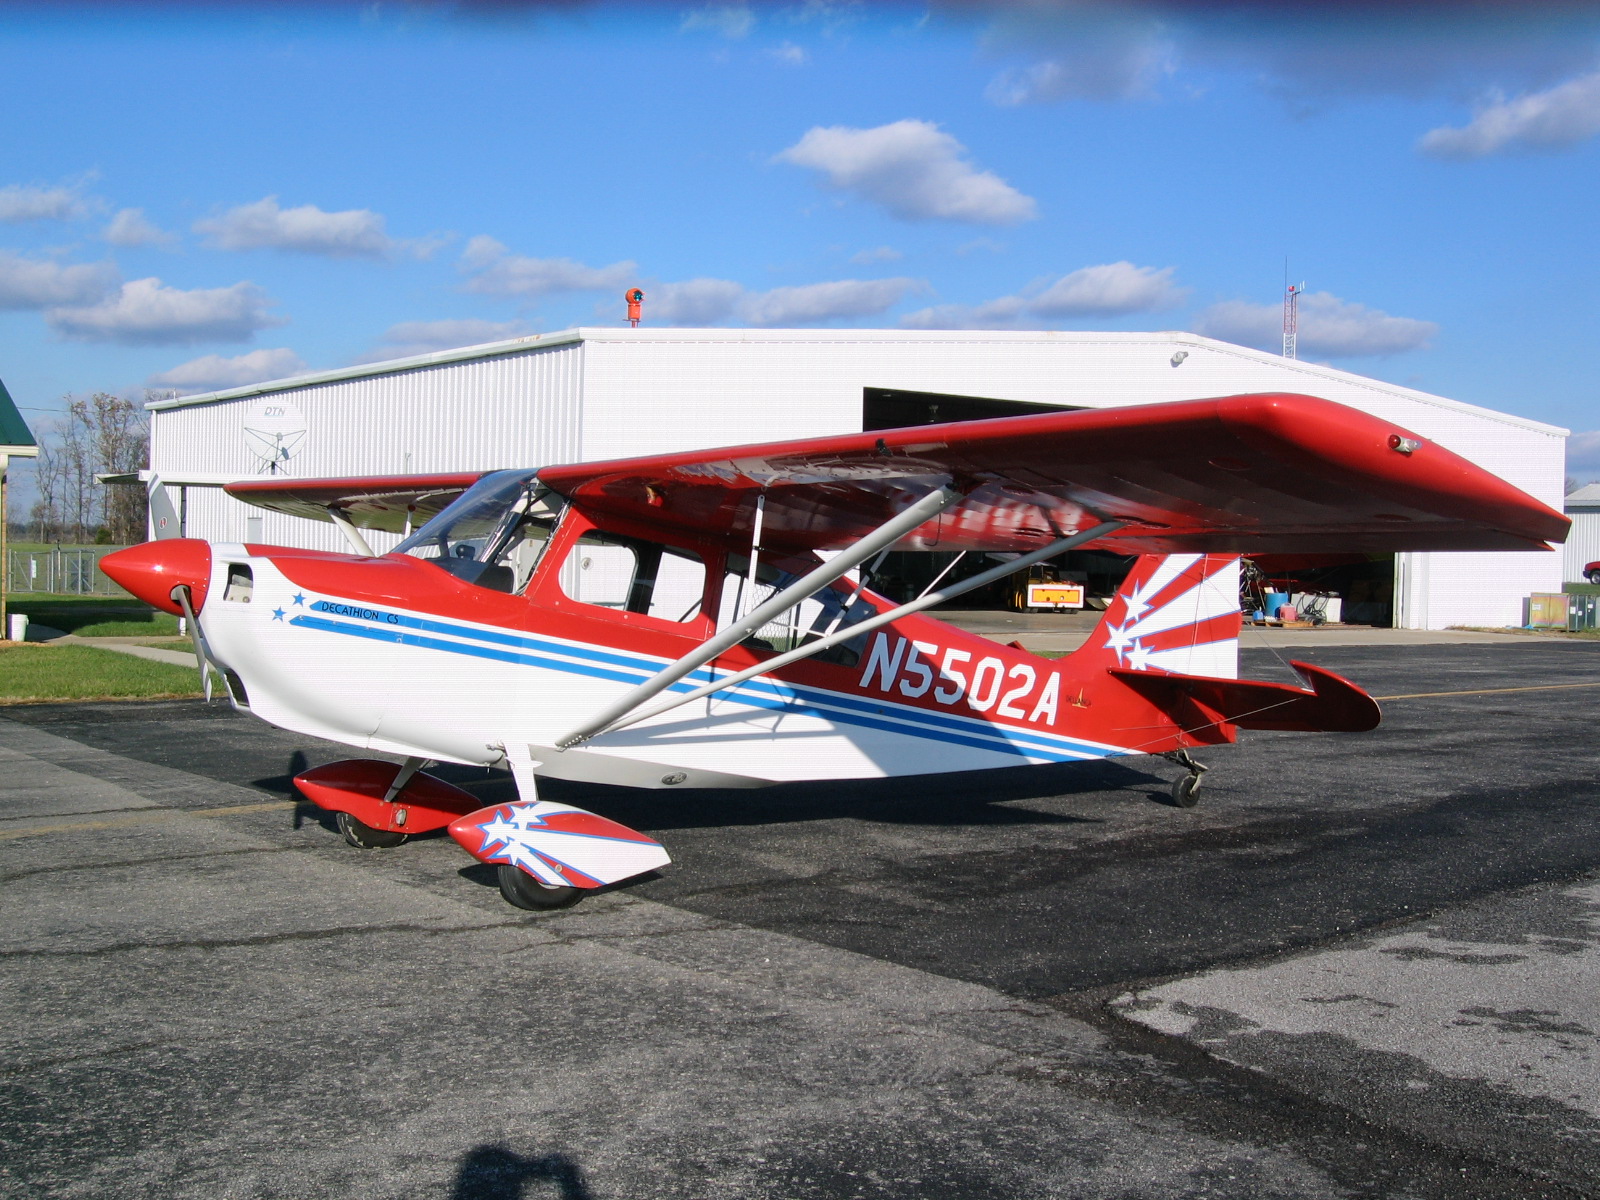
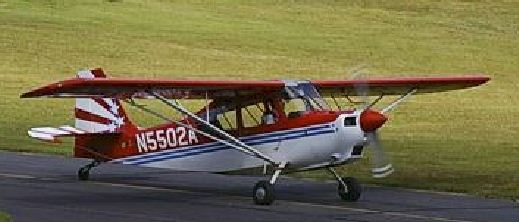
I’ll help you sharpen your foot-work in step-wise fashion. We’ll cover topics on the ground including: Primary flight controls for prevailing winds, the when, how, and why rudder pedals are used versus brakes, s-turns for forward visibility, and others. You’ll be introduced to your mount: The 1978 Bellanca Decathlon CS (CS for constant speed). This might be the first time you’ve flown an airplane with a center stick versus a control yoke, a constant speed propeller versus fixed-pitch prop, fuel injection versus a carbureted engine. We’ll talk about what’s new to you and how to effectively use it.
We’ll take some time to discuss the physics of conventional versus tricycle gear airplanes. As a matter of fact, we’ll discuss the aerodynamics of a airplane that sits on its tail versus one that doesn’t, where this is important, and where it’s not.
Download the tailwheel syllabus to get an idea of the structure of my tailwheel instruction. The following discusses what you can expect from your training.
first flight....
-
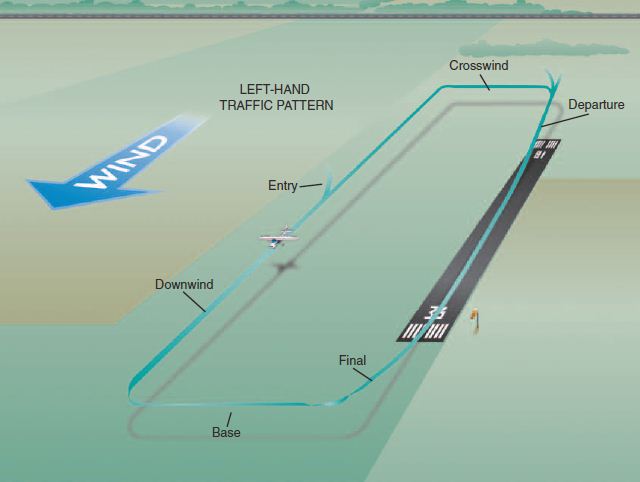
Our first flight lesson begins with a pre-flight, then startup, and taxi. You’ll get reacquainted with where the flight controls should be pointed for different wind conditions—you may think that this may not be very important to the nose-wheel airplane (it really is), but it’s critical to the tailwheel airplane and pilot.
You’ll quickly learn that to “stay ahead of the airplane” you’ll need to anticipate rudder use before it’s needed. Like much in life, timing is key. Applying timely inputs keeps things under control. It might feel like it’s out of control at first, but I won’t let you break anything (no guarantees on egos). In no time you’ll understand and be able to navigate the ramp and taxiways like a seasoned pro.
You may have read about some of the forces that grow and are ingredients to the physics recipe once power is applied for the takeoff roll: Torque, slip-stream, asymmetrical blade effect (performance- or p-factor), and gyroscopic effect. All these combine to ensure the airplane does not go straight on its own. Each of these rascals becomes a player at different times during our ground operations. Armed with your new knowledge, you’ll see that judicious use of the rudder at key moments dampens these forces and allows you draw straight lines.
Takeoff!
If there is any crosswind component, you’ll be compensating with aileron. Full deflection when not in motion, that is, when lined up on the centerline. With the stick full aft, apply full power. A quick glance at the gauges tells us the engine is running fine. Directional control is maintained with rudder. We’ll allow the airplane to tell us when the tail is to be raised. To do so, I relax stick back pressure to the a neutral position. As speed increases, the amount of crosswind aileron is decreased, maintaining just enough to eliminate drift and maintain wings level. As the speed increases, the tail begins to rise. Pushing the stick forward to raise the tail effectively “loads” the main gear and can increase takeoff roll distance. With the tail up, we’ll add just a hint of forward stick pressure in the Decathlon to prevent premature rotation. At 65 mph, slight aft stick pressure and we’re off!
air & Pattern Work
Getting to know the airplane and how control inputs affect flight is key in low-speed operations including landing. The Decathlon is one of the easier airplanes to fly. You’ll experience its predictable nature and generous manners up high, thereby building confidence that nothing unwarranted happens down low. We’ll stress rudder work at all times, wakening your feet to that very effective rudder at all airspeeds. After climb out to altitude, we’ll do some slow flight, letting you get used to how effective your new friend, the rudder, is at minimum controllable airspeed. The inclinometer becomes a good reference instrument, keeping you out of trouble.
Back in the pattern. I’ll stress attitude flying, power, and aircraft performance (you do remember that attitude + power = performance, right?). The key to effective tailwheel landings is controlling the airspeed by adjusting the sight picture (attitude). We’ll find a nice long runway where we’ll fly those stabilized approaches and three point landings. “Why the three point landing?” Good question. Let me quote from Stick and Rudder: An Explanation of the Art of Flying by Wolfgang Langewiesche (pronounced long-gah-vee-shay): “The designer is anxious to make the landing of his airplane take place at about the slowest forward speed at which the ship, with its given wing and its given weight, is aerodynamically capable of flying.” And what is that ship’s attitude when it’s flying slowly? Yup, you got it, nose-high, slow flight! The very same attitude at which the airplane sits with all three wheels on the ground and the one we practiced in our air work. So what happens when you don’t put the airplane into the three point attitude, or you do, but don’t maintain it as the speed bleeds off? The dreaded bounce! “But that’s caused by those springy landing gear, right?” Nope. It’s potentially caused by a couple things: 1) The main gear contacting the runway first, followed by that aft-of-main gear center of gravity forcing the tail down, causing an increased angle of attack, creating lift where there was none before. 2) A high vertical rate of descent, left unchecked, will cause a similar response by the airplane; a high angle of attack, followed by increased lift, followed by the airplane heading skyward. Should the bounce happen, we know that we’ve increased the angle of attack and our speed is or will begin to decay. With a small bounce, one just continues to flair adding aft stick. A larger bounce is corrected by adding a little power at the apex of the bounce, thereby preventing the subsequent high descent rate and loss of airspeed; we simply land again (sorry, you can’t log it as two, or three landings). As you bring the stick back and contact the ground in the three-point stance, you move the stick full aft until it tickles your navel—and there you leave it, until the airplane is tied down, or until there’s a tailwind during taxi. Let me repeat this, “…keep the stick full aft after touchdown.” The tricycle gear pilot tends to relax the back pressure once firmly on the ground, and as the center of gravity is forward of the main gear, it won’t get the nose gear driver into hot water. Not so with the tailwheel airplane.
landings
-
Busy feet makes me happy!
When the airplane is not on the ground, we fly conventional gear airplanes just like we fly tricycle gear airplanes. On final, I teach and use the side slip, that is, the upwind wing low. The rudder is used to align the longitudinal axis of the airplane with the centerline of the runway. The ailerons are used to correct for lateral drift. Depending on conditions, you may be a “busy beaver” on final, constantly correcting for alignment and drift, capturing your airspeed with pitch. When the “rubber meets the road” your feet will be making small, quick corrections to maintain that directional alignment. Small, timely corrections ensure you’re ahead of the airplane, and no part of the airplane wants to depart the runway until you say so.
Three point landing
“Can I use the three pointer to land in a crosswind?” You bet! The upwind wing is lowered appropriately to eliminate any lateral drift. This drift correction is maintained throughout the flair and landing rollout. As the airplane’s speed decreases, more aileron deflection is required to maintain drift control (subject to local wind conditions). If wind conditions warrant, you’re touching down on the upwind main gear and the tail wheel and as speed bleeds off, the downwind wheel slowly lowers to the runway surface. Crosswind control inputs are continued as are rudder inputs to maintain directional control. You’ve heard the expression, “don’t stop flying the airplane until it’s tied down”? It’s so true for the conventional gear airplane.
Wheel landings
I teach flying the same speeds at touchdown as the three-pionter for the wheel landing (that's 70 mph in the Decathlon with two on board, 65 when flying solo). The main difference between the two types of landing is that the descent rate during the last few feet for the wheel landing is less. We’re very close to or at stall speed on touchdown on a three point landing—not so much for a wheel landing as the angle of attack is less. As soon as our mains touch down, we add a small amount of forward elevator (a higher descent rate requires a more robust forward elevator input), all the while maintaining directional control with rudder, and continuing to arrest drift with aileron. The airplanes's CG wants to continue its downward vector at touchdown (which also causes the angle of attack to increase, which then can cause a bounce), but we want the longitudinal axis parallel with the runway. If our descent rate is high, a greater elevator input is required to prevent the tail from lowering. To prevent undue loads on the mains during landing, we therefore decrease that descent rate.
Forward stick at landing goes against much you were taught during your primary training in a tricycle gear airplane. In the tailwheel airplane, we want to maintain our best steering capabilities in that crosswind, with the tail up. As our speed decreases, more forward elevator is used; if we're dealing with a crosswind, more aileron is required, too. As we lose directional control, we apply full back/aft elevator to get the tailwheel on the ground.
go-arounds...
As part of the landing process, we’ll perform some go-arounds. If you’re perfect, I’ll insist. If not, we’ll do them as the situation requires. Knowing when to abort the landing and go-around is key. Unstable approach; go-around. Loss of directional control; go-around. Runway incursion or other hazard; go-around. A review from primary training indicates that one must apply full power, establish the proper flight attitude, and make the necessary configuration changes (not much to do with a Decathlon for this since we have no flaps and the gear is bolted in the down position). And by all means, we’ll continue to use those feet in the go-around, negating those torque effects.
We’ve covered it all
Normal and crosswind takeoffs and landings, wheel landings, and go-arounds. If you have a look at the Federal Aviation Regulation (FAR) §61.31(i) Additional training required for operating tailwheel airplanes one notes that the FAA identified the elements of our discussion on this page.

Is
there more to know?
Heck yeah. Lots. We’ve scratched the surface. If you’d like to do a little reading on the subject, you can navigate to the FAA’s web site (faa.gov) and download, free of charge, Chapter 13 Transition to Tailwheel Airplanes in the Airplane Flying Handbook (FAA-H-8083-3A). An excellent book on the topic is Harvey Plourde’s The Compleat Taildragger Pilot. As noted earlier, Langewiesche’s Stick and Rudder is a favorite; Part V Getting Down, covers much material on our topic.
 How
long will this take?
How
long will this take?
Everyone is different. Figure
anywhere from five to ten hours. Good motor skills, honestly using your
feet on all your landings already, good depth perception and judgment,
able to think ahead of the airplane, see things happening in real-time,
did your studying before strapping on the airplane, you’ll have that
endorsement at the bottom of my estimate.
